
Nikon F2 As Manual: A Comprehensive Guide (Updated 04/21/2026)
Welcome! This manual, updated today – 04/21/2026 – provides a step-by-step guide to unlock the full potential of your Nikon F2, ensuring optimal performance and enjoyment.
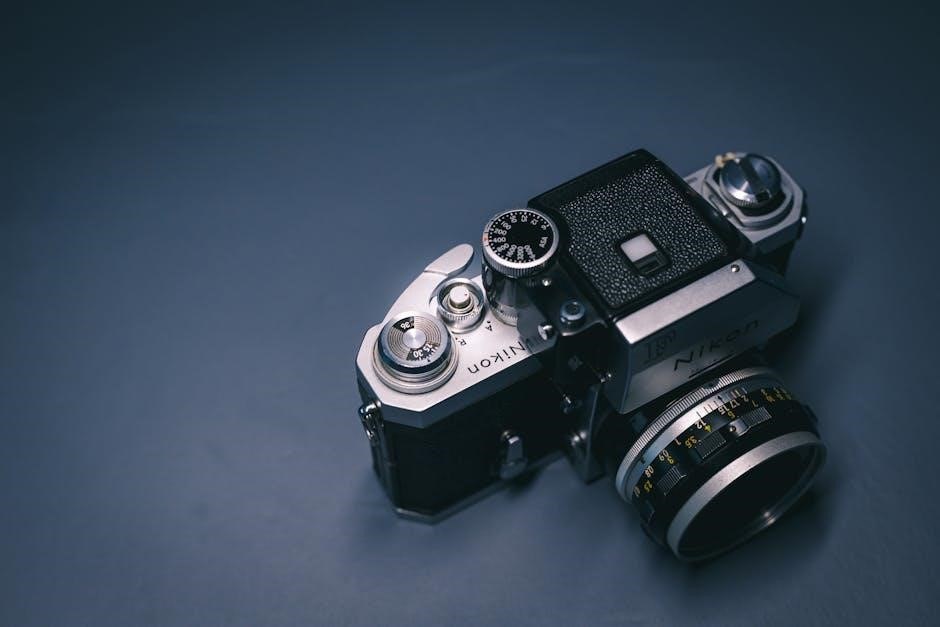
The Nikon F2, a cornerstone of 35mm photography, represents a significant evolution in the Nikon F series. Released in 1971, it quickly became a favorite among professionals and serious enthusiasts alike, renowned for its robust build quality, exceptional reliability, and advanced features for its time. This manual is designed to guide you through every aspect of using this iconic camera, from basic operation to advanced techniques.
Whether you’re a seasoned photographer revisiting a classic or a newcomer exploring the world of film, this comprehensive resource will help you understand and appreciate the Nikon F2’s capabilities. We’ll cover everything from loading film and setting exposure to utilizing external light meters and troubleshooting common issues. Prepare to embark on a journey into the world of analog photography with a camera that continues to inspire generations.
Historical Context of the Nikon F2
Emerging in 1971, the Nikon F2 arrived during a pivotal moment in photographic history, bridging the gap between fully mechanical cameras and those incorporating electronic elements. It followed the highly successful Nikon F, addressing user feedback and pushing the boundaries of SLR technology. The F2 distinguished itself with its hot shoe for flash synchronization and, crucially, the option for aperture-priority auto-exposure – a groundbreaking feature at the time.
This innovation, alongside its remarkably durable construction, cemented the F2’s place as a workhorse for photojournalists and professionals. It competed directly with cameras from Canon and Pentax, establishing Nikon as a leading force in the 35mm market. Understanding this historical context illuminates why the F2 remains so highly regarded – it wasn’t just a camera; it was a symbol of photographic progress.
Key Features and Specifications
The Nikon F2 boasts a robust, fully mechanical operation, ensuring reliability even without batteries (except for metering). It features a focal plane shutter offering speeds from 1 second to 1/2000th of a second, plus Bulb mode. The camera accepts any Nikon F-mount lens, providing incredible versatility. Key specifications include a standard film advance lever, a rewind crank, and a built-in light meter (optional Photomic finder required).
The F2’s modular design allows for interchangeable finders, offering different metering options. It supports 35mm film in various ISO speeds. Its solid build quality, combined with its advanced features for the era, made it a favorite among professionals. The camera’s dimensions are approximately 147.5 x 100 x 86 mm, and it weighs around 1020g.

Understanding the Nikon F2 Body
Explore the F2’s durable construction, meticulously engineered for longevity and precision, revealing the core mechanics that define this iconic, fully mechanical 35mm SLR camera.
Body Construction and Materials
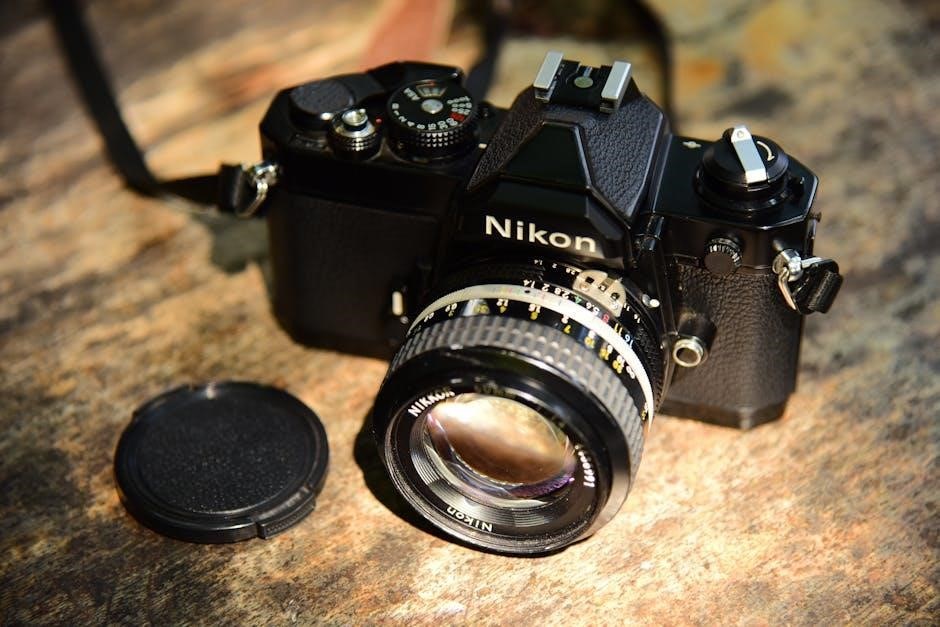
The Nikon F2’s body is a testament to robust engineering, primarily constructed from a high-quality aluminum alloy. This material choice delivers exceptional durability, capable of withstanding rigorous use in diverse shooting environments. The top and bottom plates are crafted from a heavier gauge aluminum, providing increased protection for the internal components and a reassuringly solid feel in the hand.
Internal chassis elements utilize a blend of aluminum and steel, strategically implemented to balance weight and structural integrity. Leatherette covering, applied to the front and rear of the camera, offers a comfortable grip and enhances the overall aesthetic. The film door and various control dials feature precision-machined brass components, contributing to smooth operation and long-term reliability. Nikon prioritized a fully mechanical design, minimizing reliance on electronic parts, which further bolsters the F2’s resilience and longevity. This commitment to quality materials ensures the camera remains a dependable tool for years to come.
Viewfinder System Details
The Nikon F2’s viewfinder is a bright and clear optical system, offering approximately 93% coverage of the actual image area. This provides a reasonably accurate preview of the final photograph, though some framing adjustments may be necessary. It features a split-image rangefinder collar for precise focusing, complemented by a central microprism collar for enhanced accuracy, particularly in lower light conditions.
Diopters are adjustable, accommodating users with varying visual acuity without the need for eyeglasses. The viewfinder also displays essential exposure information, including shutter speed and aperture settings when using compatible lenses with automatic aperture control. A convenient depth-of-field preview lever allows photographers to visualize the extent of focus at the selected aperture. The large viewfinder window contributes to a comfortable and immersive shooting experience, facilitating precise composition and focusing.
Film Advance and Rewind Mechanisms
The Nikon F2 employs a smooth and reliable manual film advance lever, allowing for precise control over frame progression. A stroke of the lever advances the film and simultaneously cocks the shutter, preparing the camera for the next exposure. The lever’s action is robust and consistent, even with prolonged use. A frame counter clearly displays the number of exposures taken, preventing accidental double exposures or running out of film unexpectedly.
Rewinding the film is equally straightforward, utilizing a crank handle on the camera’s top plate. The rewind mechanism is designed to smoothly and completely retract the film back into the cassette, ensuring easy removal. A rewind release button must be pressed before commencing the rewind process. These mechanisms are built to withstand years of use, embodying the F2’s reputation for durability and reliability.

Exposure Control and Metering
Mastering exposure with the Nikon F2 involves understanding its shutter speed and aperture controls, alongside utilizing both built-in and external metering options effectively.
Aperture Priority Mode Explained
The Nikon F2, while renowned for its fully manual operation, doesn’t inherently possess a dedicated “Aperture Priority” mode as found in later cameras. However, photographers skillfully achieve a similar workflow by pre-selecting their desired aperture – controlling depth of field and creative effects – and then adjusting the shutter speed to attain correct exposure.
This requires a solid understanding of the exposure triangle and consistent use of a handheld light meter or the F2’s internal metering system (when coupled with an appropriate Photomic finder). Setting the aperture first allows focusing on artistic intent, letting the photographer dictate how much of the scene is in focus.
Subsequently, the shutter speed is adjusted based on the light meter’s reading to ensure a properly exposed image. This method prioritizes creative control over convenience, a hallmark of the F2’s photographic philosophy. It’s a deliberate, thoughtful approach to exposure, rewarding precision and understanding.
Shutter Speed Control – A Detailed Look
The Nikon F2’s shutter speed dial is a central element of its operation, offering a range from 1 second to 1/2000th of a second, plus Bulb (B) for long exposures. This dial is mechanically linked to the camera’s robust focal plane shutter, demanding deliberate and tactile control.
Shutter speed directly impacts motion blur and the amount of light reaching the film. Faster speeds freeze action, while slower speeds allow for creative motion blur and require a stable shooting platform. The dial’s positioning necessitates locking it before winding the film advance to prevent accidental changes.
Understanding the interplay between shutter speed and aperture is crucial for achieving correct exposure. The F2’s fully manual nature means the photographer is entirely responsible for selecting the appropriate speed based on the scene’s lighting conditions and desired effect, utilizing a light meter for accurate readings.
Metering System – How it Works
The Nikon F2 features a center-weighted averaging metering system, activated by a lever located near the lens mount. This system measures light predominantly from the central portion of the frame, diminishing in sensitivity towards the edges. It’s crucial to understand this weighting when composing shots, ensuring your primary subject falls within the central area for accurate readings.
When activated, the meter displays a needle within the viewfinder, indicating underexposure, correct exposure, or overexposure. The photographer then adjusts both aperture and shutter speed to center the needle, achieving the desired exposure.
The F2’s metering system relies on a CdS light sensor. Remember that CdS meters can be affected by extremely low or very high temperatures, potentially impacting accuracy. Utilizing an external light meter is recommended in challenging conditions.
Using External Light Meters with the F2
While the Nikon F2’s built-in meter is reliable, employing an external light meter offers enhanced precision and flexibility, particularly in complex lighting scenarios. The F2 readily accepts readings from both incident and reflected light meters. Incident meters measure the light falling on your subject, providing a more accurate reading unaffected by reflectivity. Reflected meters, conversely, measure the light reflected from the subject.
To utilize an external meter, simply take a reading and then manually set the corresponding aperture and shutter speed on the F2. This bypasses the camera’s internal metering system, granting complete control.
Consider an external meter essential for challenging conditions, like backlit scenes or when photographing subjects with extreme tonal variations, ensuring consistently well-exposed photographs.

Lenses and Compatibility
Explore a world of optics! The Nikon F2 boasts compatibility with a vast array of Nikon F-mount lenses, offering diverse creative possibilities for every photographer.
Nikon F-Mount Lenses – An Overview
The Nikon F-mount, introduced in 1959, represents a cornerstone of photographic lens design, and the Nikon F2 fully embraces its versatility. This bayonet mount system allows for a secure and precise connection between the camera body and a wide spectrum of lenses. Initially designed for rangefinder lenses, it quickly adapted to support Single Lens Reflex (SLR) operation, becoming a standard for decades.
The F-mount’s enduring success stems from its mechanical simplicity and robust construction. It facilitates accurate light measurement and reliable autofocus functionality in later iterations. The mount diameter of 55mm and a flange focal distance of 46.5mm have enabled countless lens designs, from standard primes to specialized telephotos and macro lenses. Understanding the F-mount is key to unlocking the full potential of your Nikon F2, allowing you to explore a rich legacy of optical excellence.
Compatible Lens Series for the F2
The Nikon F2 boasts exceptional compatibility, accepting lenses from numerous series throughout Nikon’s history. Early Non-AI lenses, predating the Auto Indexing system, function perfectly with the F2, though requiring manual aperture control via the aperture ring. The later AI and AIS (Auto Indexing System) lenses offer a distinct click-stop aperture control, enhancing usability.
Furthermore, the F2 can adapt to modern AI-P lenses, though these require a slight modification or adapter for full functionality. Series like the Nikkor-H, Nikkor-S, and Nikkor-C lenses are all viable options, offering a diverse range of focal lengths and optical characteristics. Exploring these series allows photographers to tap into a vast reservoir of classic Nikon glass, enriching their creative possibilities with the F2’s robust mechanics.
Focusing Techniques with Nikon F2 Lenses
Achieving sharp focus with the Nikon F2 relies on mastering manual focusing techniques. Utilize the split-image rangefinder in the viewfinder; align the split image for precise focus on your subject. For lower light conditions, the central matte focusing screen assists, though it demands more careful observation. Remember, depth of field plays a crucial role – smaller apertures (higher f-numbers) increase depth of field, offering a wider in-focus area.
Practice rock-and-focus, gently moving your body to fine-tune focus, especially with longer focal length lenses. Pre-focusing on a point and then waiting for the subject to enter the plane of focus is also effective. Consistent practice will build muscle memory, enabling quick and accurate focusing with any compatible Nikon F-mount lens.
Using the Nikon F2: Practical Guide
Let’s begin! This section details essential steps for operating your Nikon F2, covering film loading, exposure settings, and utilizing the self-timer effectively.
Loading and Unloading Film
Film Loading: Begin by opening the camera back using the film release lever. Insert the film canister into the left side of the camera chamber, ensuring it clicks into place. Pull the film leader across the camera and attach it to the take-up spool. Advance the film using the film advance lever, checking that the sprocket holes engage properly. Close the camera back firmly.
Film Advancement & Rewind: As you shoot, use the film advance lever to move the film forward. Keep track of the frame count using the film counter. When you reach the end of the roll, press the film rewind button on the bottom of the camera. Use the rewind crank to carefully rewind the film back into the canister. Once fully rewound, open the camera back and remove the film canister. Proper loading and rewinding are crucial for preserving your images and maintaining the camera’s functionality.
Setting ISO and Aperture
ISO Setting: The Nikon F2 requires manual ISO setting. Locate the ISO dial, typically found around the film speed indicator. Rotate the dial to align the desired ISO value with the reference mark. Accurate ISO setting is vital for correct exposure; mismatching can lead to under or overexposed photographs. Remember to adjust this dial whenever you change film types.
Aperture Control: The aperture ring on your Nikon F2 lens controls the lens opening, influencing depth of field and light intake. Rotate the ring to select your desired f-stop (e.g., f/2.8, f/8, f/16). Smaller f-numbers create shallow depth of field, while larger f-numbers yield greater depth of field. Coordinate aperture with shutter speed for optimal exposure.
Setting Shutter Speed
Shutter Speed Dial: The Nikon F2’s shutter speed is adjusted via the dial located on the camera’s top plate. This dial offers a range of speeds, typically from 1 second to 1/2000th of a second, plus Bulb (B) for long exposures. Carefully rotate the dial to select the desired speed.
Understanding Shutter Speed: Faster shutter speeds freeze motion, ideal for sports or wildlife. Slower speeds blur motion, useful for artistic effects or low-light situations. Remember that slower speeds require a stable camera or tripod to avoid blur. Coordinate shutter speed with aperture to achieve proper exposure, considering the scene’s lighting conditions and your creative intent.
Using the Self-Timer
Activating the Self-Timer: Located near the shutter release, the self-timer lever on the Nikon F2 allows for delayed shutter activation. Gently move the lever to the ‘S’ position. This initiates a roughly 10-second delay before the shutter fires, giving you time to compose yourself in the frame.
Operational Considerations: After activating, press the shutter release button as you normally would. The mirror will lock up, and a red lamp illuminates, indicating the timer is running. Avoid touching the camera during the delay to prevent unwanted movement. The shutter releases automatically after the set time. Return the lever to its original position after each use to ensure normal operation.
Advanced Techniques and Features
Explore further! This section delves into mastering depth of field, filter usage, multiple exposures, and troubleshooting, enhancing your Nikon F2 experience significantly.
Depth of Field Control
Mastering Depth of Field with the Nikon F2 is crucial for creative control. Depth of field, the area appearing sharp in your photograph, is influenced by aperture, focal length, and subject distance. A wider aperture (smaller f-number like f/2.8) creates a shallow depth of field, ideal for isolating subjects with blurred backgrounds – perfect for portraits. Conversely, a narrower aperture (larger f-number like f/16) yields a greater depth of field, ensuring sharpness from foreground to background, suitable for landscapes.
The Nikon F2’s aperture ring on compatible lenses allows precise control. Experiment with different settings to understand their impact. Remember, focusing accurately is paramount; even a slight misfocus can affect perceived sharpness. Utilize the F2’s bright viewfinder to ensure critical focus. Consider the hyperfocal distance technique for maximizing sharpness at specific apertures and distances, a valuable skill for landscape photography. Practice consistently to intuitively control depth of field and elevate your photographic storytelling.
Using Filters with the Nikon F2
Enhance your Nikon F2’s capabilities with filters! The F2’s filter threads accommodate a wide range of options. UV filters protect the front element of your lens from scratches and dust, while skylight filters subtly warm tones. Polarizing filters reduce glare and reflections, enhancing color saturation – ideal for landscapes and water scenes. Neutral Density (ND) filters reduce light entering the lens, allowing for wider apertures in bright conditions or creating motion blur.
When selecting filters, ensure they are high-quality to avoid image degradation. Screw-on filters are common, but adapter rings can expand compatibility. Be mindful of potential vignetting, especially with stacked filters. Clean filters regularly to maintain image quality. Experiment with color filters for creative effects, like black and white conversions. Filters are a cost-effective way to expand your creative toolkit with the Nikon F2.
Multiple Exposures – A Step-by-Step Guide
Creating multiple exposures with the Nikon F2 requires understanding its mechanics. First, after taking your initial exposure, do not advance the film. Engage the rewind release button (usually marked ‘R’) and gently rewind the film leader back into the cassette, just enough to access the unexposed portion of the film. Re-cock the shutter and compose your second image.
Carefully consider your exposure values for each shot; overexposure can easily occur. Practice is key! For predictable results, use the film counter as a guide. Some photographers prefer to fully expose a roll, then rewind and re-load for multiple exposures. Experiment with different combinations to achieve surreal or artistic effects. Remember to disengage the rewind release after each exposure to prevent accidental rewinding.
Troubleshooting Common Issues
Sticky Shutter: A common F2 issue is a slow or sticky shutter. Often, this stems from dried lubricants. Do not attempt self-repair; professional servicing is recommended. Film Advance Problems: If the film isn’t advancing, check the rewind knob is fully reset. Ensure the film leader is correctly engaged with the take-up spool. Light Leaks: Inspect the light seals around the film door and rewind knob. Deteriorated seals cause light leaks, resulting in foggy images.
Viewfinder Issues: A dim viewfinder might indicate a dirty focusing screen. Professional cleaning is advised. If the meter isn’t functioning, check the battery (if applicable) and ensure correct ISO setting. Remember, preventative maintenance significantly reduces these issues. Regular cleaning and careful handling will prolong your F2’s life.

Maintenance and Care
Preserve your investment! Regular cleaning, careful lens storage, and proper camera storage are crucial for maintaining the Nikon F2’s functionality and longevity.
Cleaning the Nikon F2 Body
Maintaining a pristine body is essential. Begin by using a soft-bristled brush to gently remove any loose dust or debris from the camera’s exterior surfaces, including the top plate, bottom plate, and sides. Avoid applying excessive pressure, as this could potentially scratch the finish.
For more stubborn dirt or fingerprints, lightly dampen a soft, lint-free cloth with a mild cleaning solution specifically designed for camera equipment – isopropyl alcohol diluted with water works well. Never use harsh chemicals or solvents, as these can damage the camera’s finish or internal components.
Pay particular attention to the viewfinder eyepiece and film chamber, as these areas tend to accumulate dust and grime. Use a clean, dry cloth to wipe these areas gently. Regularly inspect and clean the film rails to ensure smooth film transport. Remember to always power off the camera before cleaning.
Lens Care and Storage
Protecting your Nikon F2 lenses is paramount. After each use, gently remove dust and fingerprints from the lens surface using a blower brush to lift particles, followed by a soft, lint-free lens cloth. Utilize lens cleaning fluid sparingly, applying it to the cloth, not directly onto the lens.
Avoid touching the lens elements with your fingers. When storing lenses, always use lens caps to prevent dust accumulation and accidental scratches. For long-term storage, consider using a dedicated lens case or pouch, ideally with desiccant packs to absorb moisture and prevent fungal growth.
Store lenses in a cool, dry place, away from direct sunlight and extreme temperatures. Regularly inspect lenses for signs of fungus or haze. Proper lens care ensures optimal image quality and extends the lifespan of your valuable Nikon optics.
Proper Storage of the Camera
Long-term preservation of your Nikon F2 requires careful storage practices. Before storing, remove the batteries to prevent corrosion and potential damage. Store the camera body in a cool, dry environment, shielded from direct sunlight and extreme temperatures. A dedicated camera bag or case offers excellent protection against dust, moisture, and accidental impacts.
Consider including desiccant packs within the storage container to absorb any residual moisture. Avoid storing the camera in damp basements or hot attics. Regularly check the storage location for signs of mold or mildew.
Loosen the shutter speed dial and film advance lever periodically to prevent them from seizing. Proper storage ensures your Nikon F2 remains in optimal working condition for years to come, ready for your next photographic adventure.
Servicing and Repair Options
Maintaining your Nikon F2’s longevity may necessitate professional servicing or repair. While a robust camera, components can degrade over time. Nikon’s official service centers offer expert repairs, utilizing genuine parts and maintaining original specifications. However, these services can be costly and have longer turnaround times.
Numerous independent repair shops specialize in classic film cameras, often providing more affordable and quicker solutions. Research thoroughly, checking for certifications and customer reviews before entrusting your F2 to a third-party technician.
Simple maintenance, like cleaning and lubrication, can be performed by experienced users, but complex repairs should always be left to professionals to avoid further damage. Regular check-ups can prevent minor issues from escalating into major problems.